Sending Minimed 770G Data To Nightscout On AWS
Posted on Sat 12 March 2022 in Tech • 7 min read
This past week, I set up Nightscout to read my blood glucose data from my Minimed 770G insulin pump. I deviated from the standard Nightscout setup in a few ways. Notably, it seems to be easier to host Nightscout on Heroku using MongoDB Atlas and read data from a Dexcom continuous glucose monitor. Instead, I set up my own EC2 server in AWS that ran both local MongoDB and Nightscout.
My Tech Stack
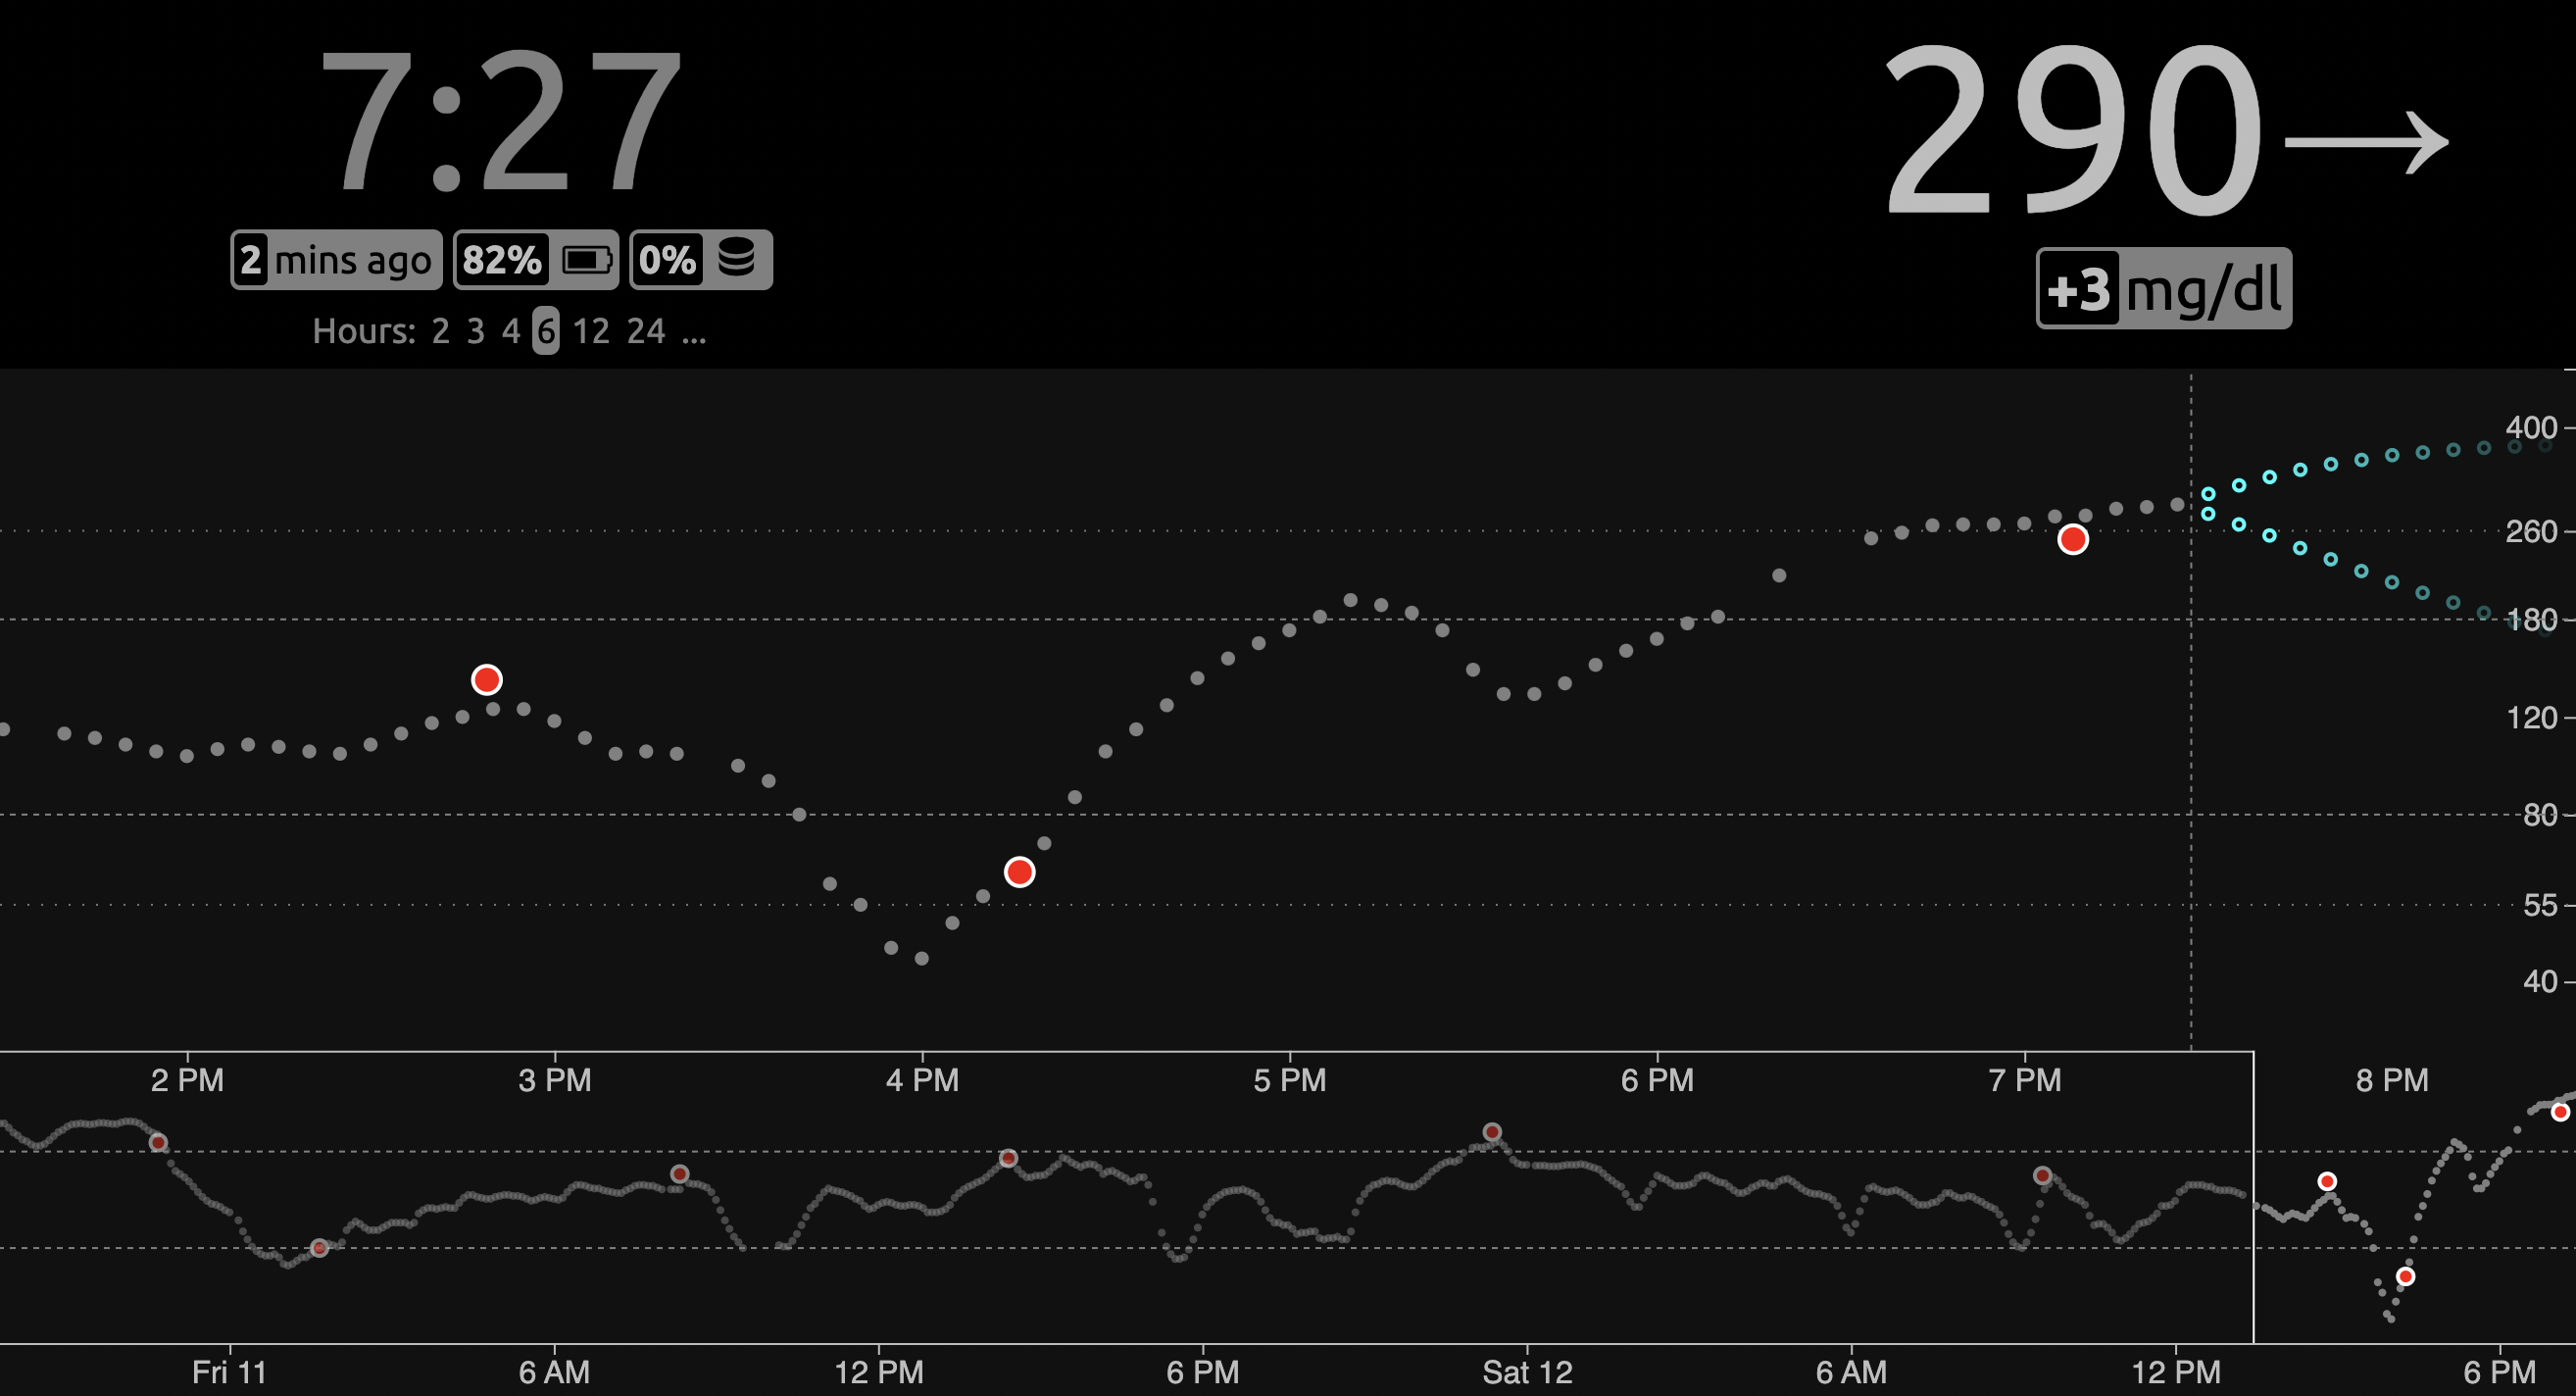
I currently have a Minimed 770G insulin pump, which uses the Guardian CGM (Continuous Glucose Monitor). Now that I have a modern Android phone in the Google Pixel 6, the pump reads from the CGM and sends data to the Minimed Connect app on my phone. However, the notification from Minimed Connect only shows your current blood sugar, so you have to click into it to see the graphs. Also, you have to use the Minimed Carelink website to view historical trends, and the data can't be sent to my Ticwatch E3 or the taskbar on my laptop.
I decided to try out Nightscout, but I wanted to run it in AWS instead of Heroku. I use AWS for all my other hosting, and I can set it up so one of my personal domains can point to the server. I also ended up using a version of the xDrip+ Android app to send the data to Nightscout.
Nightscout Installation
As mentioned, the Nightscout docs only really talk about running on Heroku. Since Nightscout is a NodeJS app, I set up an Ubuntu server on a t3.small EC2 server to get started. I generally followed this excellent post by Reddit user Ivo_Strojnica, but had to make a few tweaks. Here are the steps:
1. Create the EC2 server
I used t3.small with 30GB of disk space. I picked the latest Ubuntu AMI, which at the time was Ubuntu Server 20.04 LTS (HVM). For the security group, I allowed all traffic from the security group itself, and then I allowed my home IP for ports:
- 22 - SSH
- 80 - HTTP
- 443 - HTTPS
- 1234 - Local web server port, but this can be anything you want
- 27017 - MongoDB port
2. SSH onto the server
Once the server is up, log in using the SSH keypair you selected during setup.
3. Install MongoDB
I generally followed the MongoDB documentation for this. The commands are based on MongoDB 5.0
wget -qO - https://www.mongodb.org/static/pgp/server-5.0.asc | sudo apt-key add -
echo "deb [ arch=amd64,arm64 ] https://repo.mongodb.org/apt/ubuntu focal/mongodb-org/5.0 multiverse" | sudo tee /etc/apt/sources.list.d/mongodb-org-5.0.list
sudo apt-get update
sudo apt-get install -y mongodb-org
sudo apt-get install nodejs npm git
sudo systemctl start mongod
sudo systemctl enable mongod
4. Setup MongoDB
Login to the MongoDB shell using the mongo command, then run the commands that follow. Note that there will be a prompt after running db.createUser, so just remember that password as you'll need it later.
> use admin
> db.createUser(
      {
        user: "myUserAdmin",
        pwd: passwordPrompt(), // or cleartext password
        roles: [ { role: "userAdminAnyDatabase", db: "admin" }, "readWriteAnyDatabase" ]
      }
    )
> exit
Then, you'll need to edit /etc/mongodb.conf and put in the following:
processManagement:
   fork: true
net:
   bindIp: localhost
   port: 27017
storage:
   dbPath: /var/lib/mongo
systemLog:
   destination: file
   path: "/var/log/mongodb/mongod.log"
   logAppend: true
storage:
   journal:
      enabled: true
security:
   authorization: enabled
Once that is in place, restart MongoDB using sudo systemctl restart mongod
5. Download Nightscout
While still logged in to the EC2 server, run:
cd ~
git clone https://github.com/nightscout/cgm-remote-monitor.git
cd cgm-remote-monitor/
npm install
6. Configure Nightscout as a systemd service
You'll need to create a startup script for systemd to run, then configure it as a automatically-starting service. First, create a new file called start.sh with the contents below. Note that you'll have to replace the items in angle brackets with your own values
1 2 3 4 5 6 7 8 9 10 11 12 13 14 15 16 17 18 19 | #!/usr/bin/bash
# environment variables
export DISPLAY_UNITS="mg/dl"
export MONGO_CONNECTION="mongodb://myUserAdmin:<PASSWORD_FROM_STEP_4>@localhost:27017/Nightscout?authSource=admin"
export BASE_URL="https://<YOUR_EVENTUAL_URL>"
export PORT=1234
export API_SECRET="<PICK_AN_API_SECRET_AT_LEAST_12_CHARS>"
export PUMP_FIELDS="reservoir battery status"
export DEVICESTATUS_ADVANCED=true
export ENABLE="careportal basal dbsize rawbg iob maker cob bwp cage iage sage boluscalc pushover treatmentnotify loop pump profile food openaps bage alexa override speech cors"
export TIME_FORMAT=12
export INSECURE_USE_HTTP=true
# start server
node server.js
|
Then, run chmod a+x start.sh to make it executable. Next, create a new file at /etc/systemd/system/nightscout.service with the contents:
[Unit]
Description=Nightscout Service
After=network.target

[Service]
Type=simple
WorkingDirectory=/home/ubuntu/cgm-remote-monitor
ExecStart=/home/ubuntu/cgm-remote-monitor/start.sh

[Install]
WantedBy=multi-user.target
To enable the service, run:
sudo systemctl daemon-reload
sudo systemctl enable nightscout.service
sudo systemctl start nightscout.service
You should be able to exit the SSH connection once the service is running.
7. Create a Target Group in AWS
The load balancer will need to route traffic to a target group. Go to the EC2 console, and choose "Target Groups" under "Load Balancing" from the left menu. Create a new target group with the following custom settings:
- Target type = Instances
- Target group name = "nightscout-tg" (or anything really, just remember this)
- Protocol = HTTP
- Port = 1234
- Health check port (under "Advanced health check settings") = 1234
8. Create a Load Balancer
I made a new load balancer for this, but using an existing one can work as well. I already had my domain loaded into Route 53 and certificates created using AWS Certificate Manager, so create those if you don't have them already. Here are the necessary load balancer settings:
- Application load balancer
- Internet-facing using IPv4
- Security groups: choose the security group that you made for the EC2 server, as it had an entry allowing all traffic from anything else with this security group
- Certificate: use the ACM certificate for your domain
- Set a listener on HTTP port 80 to redirect to HTTP port 443
- Set a listener on HTTPS port 443 to forward to the "nightscout-tg" target group from step 7

9. Create a Route 53 record
I already had my personal domain in Route 53, so I went to that hosted zone and added a new A record. For the "value" field, tick the toggle switch to "Alias". Then, in the dropdown, choose "Alias to Application and Classic Load Balancer". Pick the region in the second dropdown. In the search field that appears, if you click into the field, it should present your new load balancer as an option to choose. Now, that route 53 record will always point to the load balancer, which is pointing to the target group, which is pointing to the EC2 server.
10. Install Custom xDrip+ Android App
I tried a few ways to get my Minimed Carelink data to upload to Nightscout, but the only way that seemed to work was a custom version of xDrip+ from https://github.com/benceszasz/xDripCareLinkFollower. In the Releases on Github, I got the latest version (which was v0.1.2-beta at the time) and got the APK. I opened this on my Pixel 6 phone, and had to force Android to install from an unknown source.
This custom version of xDrip+ has settings options for Carelink. Put in your username, password, and country for Carelink, and it should start pulling data into xDrip+ from Carelink. Then, you can go to the "Cloud Upload" option in xDrip+ settings and click on "Nightscout Sync (REST-API)". Enable this, then enter the base URL as https://<YOUR_API_SECRET_FROM_STEP_6>@<ROUTE_53_RECORD_URL>/api/v1/.
11. Done!
Within a few minutes, xDrip+ will be reading data from Carelink (which is reading data from the Minimed Connect app) and sending it to your Nightscout EC2 server!
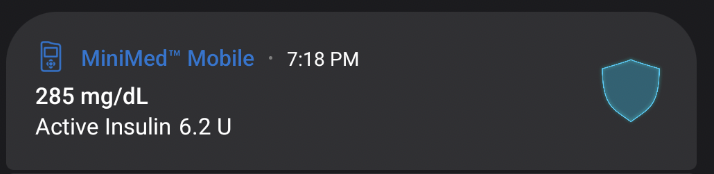
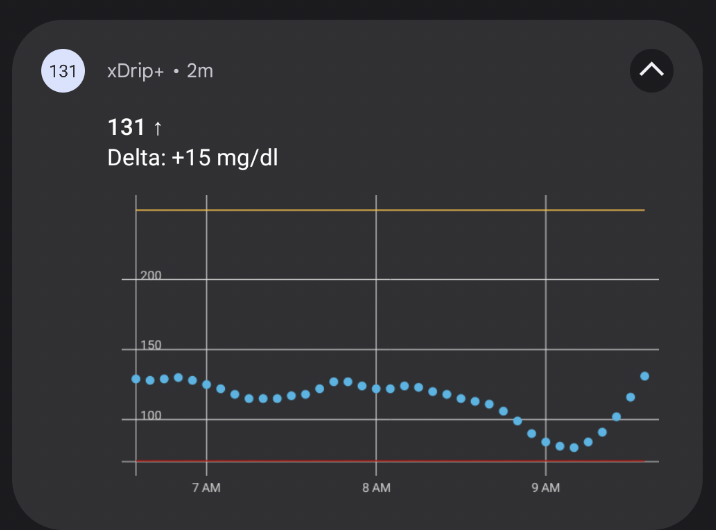
Another benefit of the xDrip setup is that I can hide the Minimed Connect notification on my phone and just use xDrip+ as my notification bar icon. This way, I can see my recent graph in my notification tray on my phone instead of having to click in to the app.
OPTIONAL: Show Blood Sugar in Mac OSX taskbar
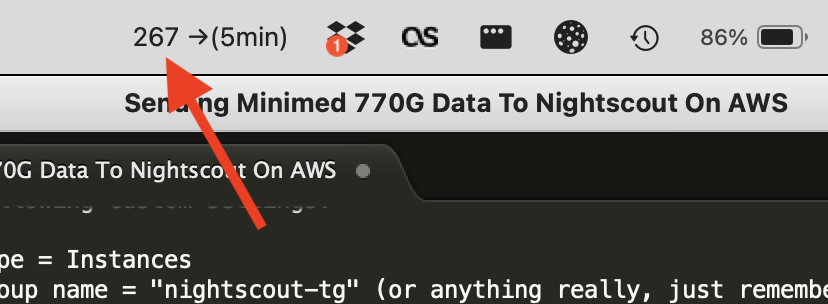
Since I'm at my laptop a lot, it would be nice to see my blood sugar without looking down at my phone. Jeremy Hay Draude made an xbar plugin that shows your current blood sugar from Nightscout.
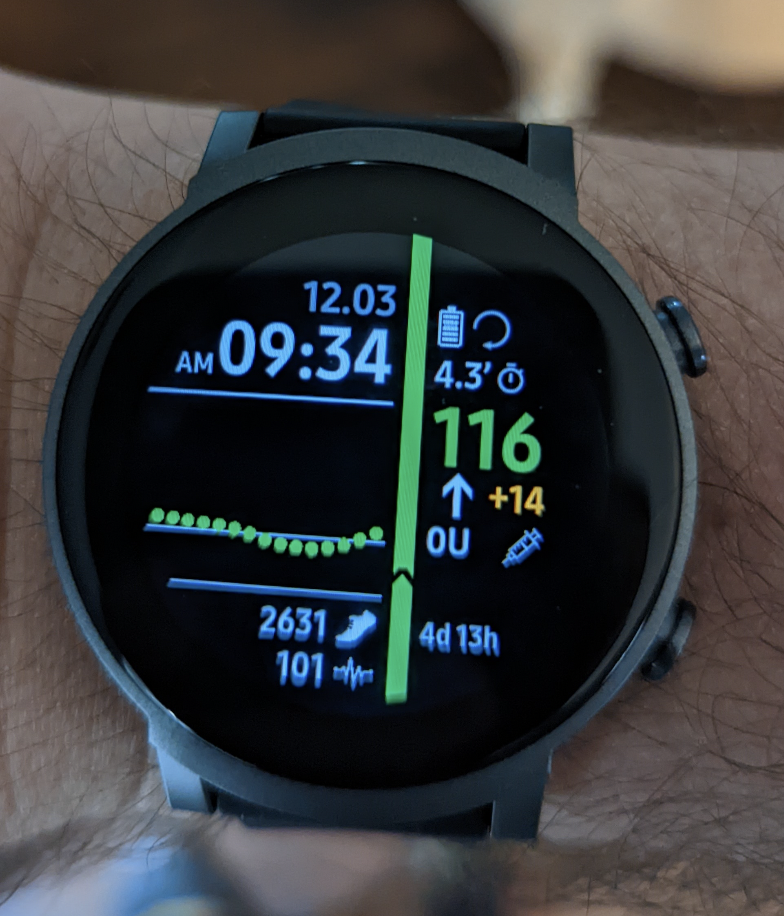
OPTIONAL: Show Data on WearOS watch
I picked up a Ticwatch E3 recently and wanted to show my blood sugar on it. I think this would be useful while driving, as it's tough to pull my pump out to look at my blood sugar (and illegal to look at my phone). I followed this guide which worked well, but it's a very involved process to make it work. The short version is to install the following apps:
It says you need to install xDrip, but we installed a custom version earlier that works for this too. Also, you can ignore the "Watchmaker-Companion" section, as that is specific to Dexcom. There's a few watch faces in the Watchmaker app, so I generally search for "xdrip" and it comes up with a variety of styles.
Conclusion
While this process was time-consuming, I'm really happy with the increased visibility into my blood sugars. It sounds strange to go to such great lengths to not have to unclip my pump from my belt, but removing that relatively minor roadblock will hopefully lead to better control of my diabetes. Also, this was a fun project to set up, and I'm looking forward to tweaking and contributing back to the diabetic community!